
Setup - Visual Studio
Microsoft Visual Studio is a professional level Integrated Development Environment (IDE) optimized for large and complex projects. In other words, it is overkill for most of the projects we do in the Computer Science program. Nevertheless, it is among the most commonly used IDEs in industry today.
An IDE is a development tool consisting of three components:
- Editor.
An editor is a tool designed to help the user create and make changes to a document.
A code editor is specifically designed to facilitate writing code.
Other common code editors include
emacs. - Compiler.
A compiler translates source code (such as Java or C++) into machine language
(such as an
.exeora.out). We useg++as the compiler in CS 124 and CS 165. - Debugger. A debugger is a program that allows the developer to pause execution of program while it is running to see what is going on inside. A debugger enables the developer to look at local variables, see which functions were called (called the "call stack"), peek at memory, and even make changes to the data of the program while it is running.
Visual Studio is an IDE designed to support a wide variety of languages. The "first class" languages include C++, Java, C#, and Visual Basic (VB).
Setup
In order to get up-and-running with Visual Studio, you will need to copy your code to your PC, install Visual Studio on your PC, create a project, link relevant libraries, and run.
1. Copy your files
The easiest way to copy your Linux program files to your PC is with a thumb drive. However, you can also use WinSCP as well.
2. Install Visual Studio
You can obtain a copy of Visual studio by using the Visual Studio Community Edition which is available for free from Microsoft.
3. Create a project
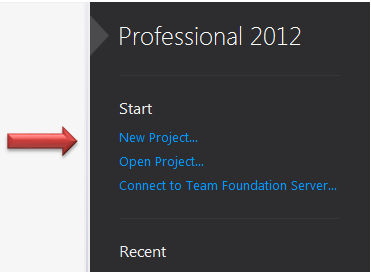
When you boot Visual Studio, the splash screen will give you a bewildering set of options. Start with selecting the "New Project..." link.
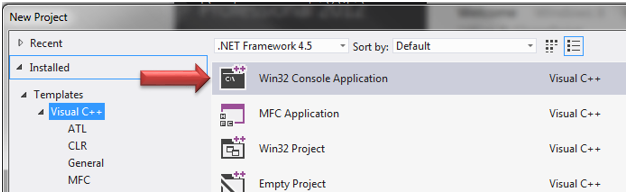
Next, select a "Win32 Console Application"
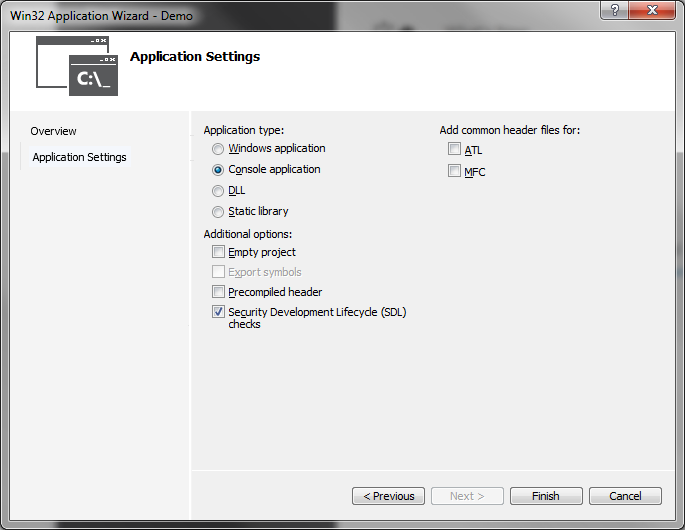
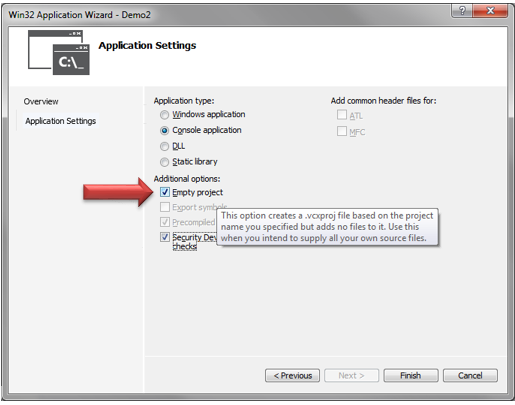
Type a name for the project at the bottom. My project is called "Demo." Select [OK] When done. At this point, the "Win32 Application Wizard" will be launched. Select [Next>] to the "Application Settings" tab and de-select the "[ ] Precompiled header" checkbox. It will look like this:
Once you select [Finish], we have a newly created project.
4. Writing new program
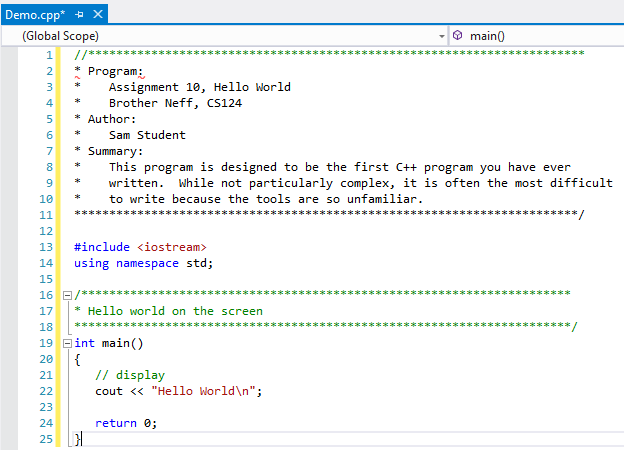
If you are starting a new program from scratch,
the first think you are likely to notice is that the main() is a bit strange.
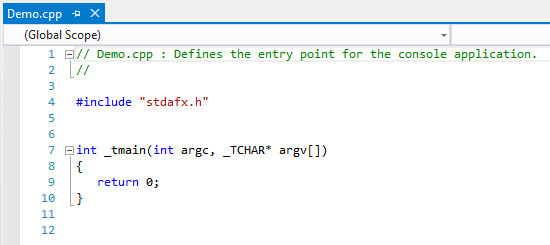
Don't let this bother you. You can replace it with your tried-and-true program:
You can compile the program with "Debug > Build Solution" or by hitting the F7 key.
You can run the program with "Debug > Start Debugging" or by hitting the F5 key. Note that Visual studio will open a window, display "Hello World", and close the window. You might want to add the following at the end of your program:
   cout << "Press any key to continue";

   cin.get();
5. Working with an existing program
The easiest way to work with a program you have written on the Linux system is,
as mentioned earlier, to put a copy of the source code
(.cpp and .h) on your thumb drive.
After you have copied this onto your PC, create a blank project as we did in Step 3.
The only difference is you will want to create an "Empty project:"
When you are done (by selecting [Finish]), then there will be no .cpp file open in the editor.
You will notice on the left a "Solution Explorer" panel.
From the file explorer, drag your source file into this location:
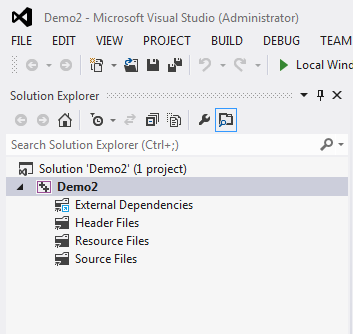
... becomes ...
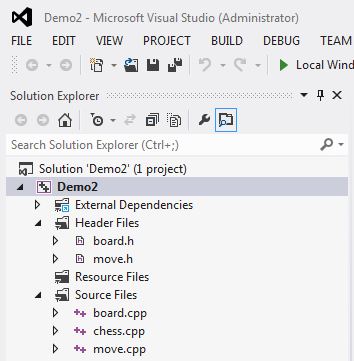
From this point, you can compile with F7 and run with F5.
6. Linking in OpenGL
Often we want to use sophisticated drawing libraries or other libraries to make our programs more full featured. Visual Studio is designed explicitly for this scenario.
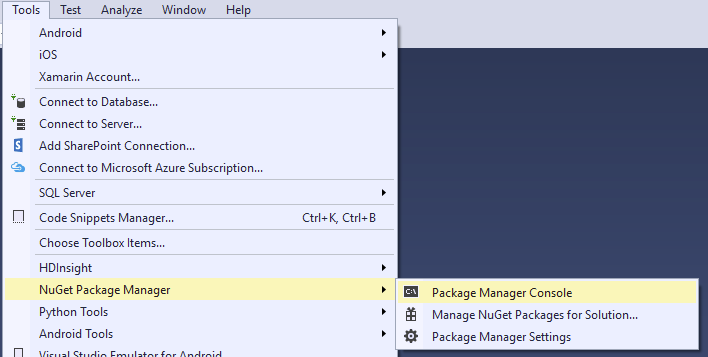
With your project open in Visual Studio, go to the Tools menu, hover over NuGet Package Manager, and select Package Manager Console.
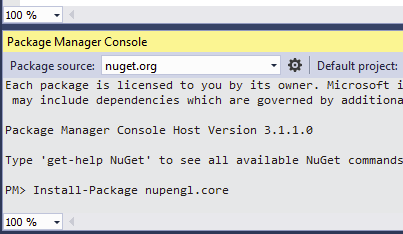
At the bottom of the window, the NuGet Package Manager Console will appear.
Click on the prompt (where it says PM>), and type: Install-Package nupengl.core
then press <enter>.
After a few minutes, if it says Successfully installed 'nupengl.core..., you should be ready to go.
Keep in mind, that you will need to repeat this step any time you create a new OpenGL project in Visual Studio.
Testing your OpenGL setup
To make sure you have done this correct, we will need to test our setup:
- Create a temporary folder on your desktop, or some other easy-to-find location.
- Using MobaXTerm or WinSCP, connect to the Linux Lab, and go to this directory:
/home/cs165new/uiTest - Copy all of the files from that directory into the folder you created.
- In Visual Studio, right-click on your project, and select "Open Folder in File Explorer...".
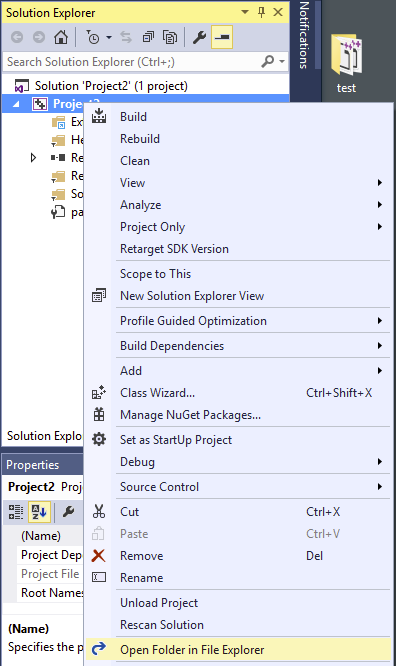
- A folder will appear that contains the files for your project. Drag the openGL files from the folder you created in step 1, into this folder.
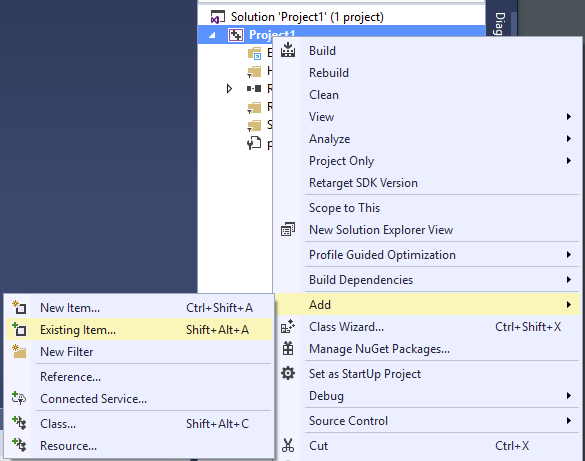
- In Visual Studio, right-click on your project, hover over "Add", and select "Existing Item..."
- If necessary, navigate to your project folder.
By default, this will be in your Documents folder.
Select all of the
.hand.cppfiles, and click Add.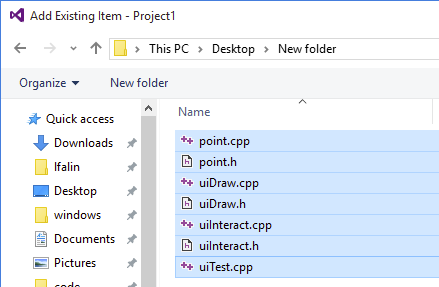
- Press F5 to build and start the project. If everything went well, you should see a window appear containing a spinning shape, which you can control with the arrow keys.