
Setup - PuTTY
PuTTY is a tool to enable you to connect to the Linux Lab from your Windows based computer. In other words, PuTTY is like a web browser; it does not do anything other than facilitate communication between two computers.
PuTTY is build on technology that has been around since the 1960's. This means it is designed to run in extremely low bandwith situations. It also takes very little computer resources. For this reasons, PuTTY is an excellent choice if your internet connection is less than ideal.
To install PuTTY on your computer, please follow these steps:
-
First, download PuTTY from the internet. You can find it at:
http://www.chiark.greenend.org.uk/~sgtatham/putty/download.html
Select the "putty.exe" link next to the "PuTTY" label.

From there, your browser will prompt you for what to do with the file. Select [Save File] and place it in a convenient location.

-
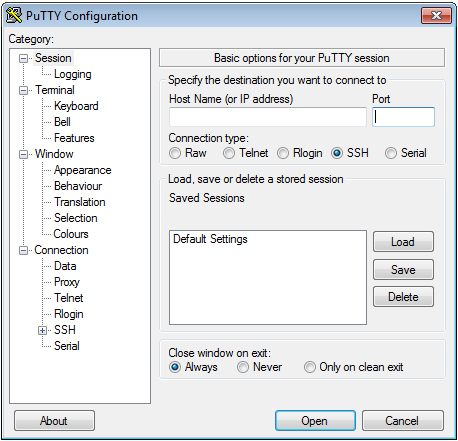
Next, run PuTTY from your computer. Using Windows Explorer, navigate to the place where you saved the file in step 1). Double-Click on that file and select [OK] if Windows asks you if you trust the file. Once it is loaded, you might want to pin the icon to your desktop so it is easy to find. When PuTTY is loaded, it should look like this:
Once PuTTY is booted, you need to configure it to point to the Linux Lab. Two things need to happen: you need to set the configuration settings and the set the screen settings.
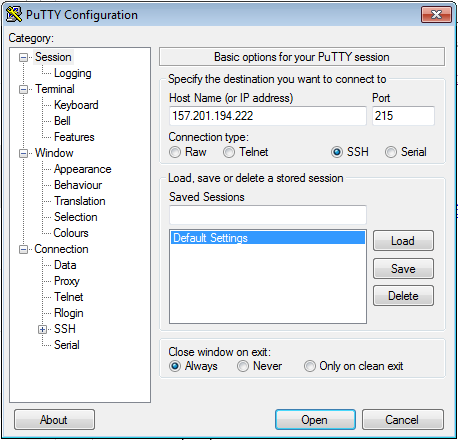
To set the configuration setting, we need to set the IP and the Port. The host name (IP address) needs to
157.201.194.xxxwhere the “xxx” is replaced by one of the values201to235. For example:157.201.194.207Once you pick one of the 35 machines to use, you will probably always use that system. If at some point, you are having problems getting a connection to the Linux Lab, you might change your configuration to use a different system (157.201.194.201through157.201.194.235) to see if the entire lab is down, or if just the system you are trying to use is down. Select the port to be215.Once you have done this, then save the setting by "Default Settings" and press [Save]. Your screen should look like this:
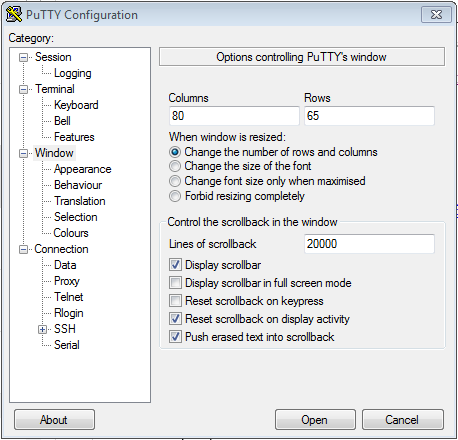
Next, you will want to set the screen settings. Under Category: select, "Window". I set the number of rows to be large so I can see many lines of code at once. For my screen, 65 is the highest number I can set before the PuTTY window becomes bigger than my screen. Additionally, I set the lines of scrollback to 20000 so I can see my entire session if need be. When done, my Window tab looks like this:
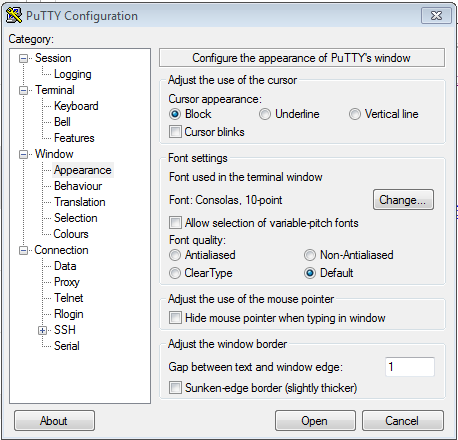
The final step to configuring PuTTY is to set the font. I prefer the Consolas font 10-point. This can be specified on the "Appearance" category and clicking on the [Change...] button. When done, by Appearance tab should look like this:
Now go back to the "Session" category and save again so all your settings will be remembered.
You can open a session by clicking on the [Open] button. If this is the first time you have connected to a given computer in the Linux Lab, a Security Alert like this will be displayed:
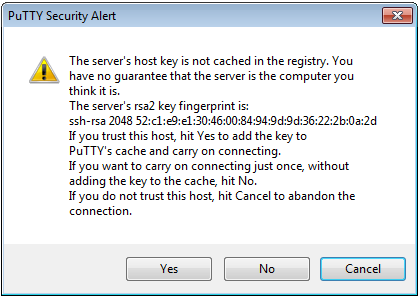
Once you select [Yes], then you will be prompted for your NetID. Enter this and press Enter.
Next you will be prompted for your password. Note that as you type the default password, nothing will be reflected on the screen. The default password is:
Temple4dpc.Now you are logged into the Linux system.